

A Railroad Heritage Journey
Rooted in Sayre, PA, we celebrate the rich history of the Lehigh Valley Railroad through original art and custom collectibles.
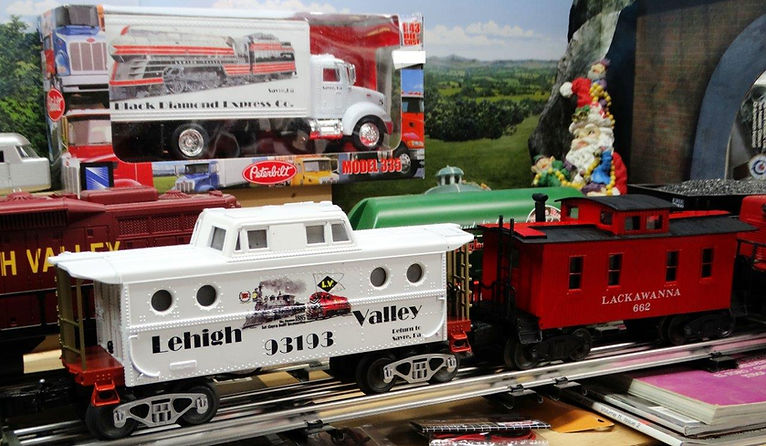
Modeling Tips and Tricks
Modeling is all about creativity and showcasing your unique design concepts. If you find a piece from another model kit that complements your current project, go ahead and incorporate it! Don't hesitate to explore and experiment with various parts. The excitement of modeling lies in creating something that truly resonates with you!
Alert!

First...Always Pay Attention...
Always pay attention to where your hands and fingers are!
Because model building involves use of sharp blades and tools, the tool edges can be dangerous and must be handled with concentration and care. If you aren't paying attention, injury could occur. Appropriate sharp tools will do the hard work for you. Always be conscious of where your fingers and hands are. Guide your tools carefully to assure the best modeling experience.
Be You!
Use unique materials...
Creativity is where it's at where model kit building is concerned. Don't limit yourself when thinking about materials to use for your model to stand out from the rest. For example, using "quilt pattern" foil that seals tops of coffee containers or nuts can be used for:
-
A firewall
-
A headliner
-
Interior Panels
-
Trunk Linings
-
Trailer Doors
-
and much more!
Trim the piece to fit your unique model vehicle space and show off your awesome re-use skill!

Assembling your model

Get Organized...
Custom Parts and Alignment
-
Stage your model parts on a surface from base of model to outside / top of model
-
Trim off excess plastic on model pieces
-
Have files on hand to smooth out any rough edges from excess plastic
-
Sandpaper can also refine rough edges to give your model a great finish!
-
-
Align your pieces as you are refining them to assure everything fits as you wish before gluing them together
-
Tape can be used to put pieces together for a visual of where any gaps may exist
-
Gaps in joints can be filled with clear modeling glue
-
-
Once you are satisfied with your alignments - assemble!
Make it clear
Style with a Glass-like look
If your model build has great interior details, you want to assure those hard-work details are seen. To help this along, on let's say...a car dashboard:
-
Place the dashboard on a flat, level and clean surface
-
Apply a drop (or slightly more depending on the size) of clear glue on the gauges
-
Allow the glue to dry over night
The next day, you will see what appears to be glass on your detailed gauges! This creates a very neat and detailed look...definitely upping your model building game!

Enjoy the process
Be patient...
Modeling requires both time and patience. Always create a plan before you start assembling. Most importantly, don't hurry the plan! This is an opportunity to be present, concentrate on the task at hand, and allow your creative self to shine. Take pleasure in the intricacies of the process to achieve the best results! Embracing this journey will lead to a lifetime of happiness in modeling.
Deep Dish Tire Rim Creation
You can create deep dish tire rims with a few around-the-home objects. For example:
-
Obtain a clear tube (such as a coin tube) and cut it to a width just bigger than the hubcap or wheel you want to deep dish
-
If the tube is not wide enough for the hubcap or wheel, widen it by carefully cutting parts from the remnants of the original tube and clear-glueing the pieces to fit the size of your part
-
-
Paint the tube a silver or chrome color (or use a chrome pen to "paint" it)
-
Carefully glue around the wheel or hubcap and steadily place it in the back of the modified tube. You now have a modified, deep dish tire rim!
Customized Dash Gauges
Customizing dash gauges is a great way to make your model car unique! For example:
-
Find or create small gauge designs or advertisements that you enjoy and want represented on your dashboard
-
Place a small dot of glue on the space you want your gauge design
-
Using tweezers, place your gauge design or ad on the dot of glue and wait for it to dry
-
Once dried, place a drop or two of Elmers or other clear-drying glue on the customized gauge and wait for it to dry (best if left overnight)
-
When fully dried, you will have what looks like glass over your newly customized dash gauge!
Chip or Coffee Can Seal Quilt Tops for Textured Interiors
You can improve your model car or truck appearance with using material you may normally throw away. For example:
-
Some chip, peanut, or coffee cans have a quilted seal top under the can lid
-
These are GREAT for adding a firewall, headliner, interior panel, or trunk or trailer door to your model
-
Cut the shape desired for whatever area you wish to add the quilt texture
-
Once cut, paint the shape to your desired color
-
Carefully glue the custom piece in place to really make your model a step above everyone else's because of this unique touch!